TinyMCE - Salesforce Rich Text Editor
This post explains how to add an external rich text editor on VF Page. I am using TinyMCE.
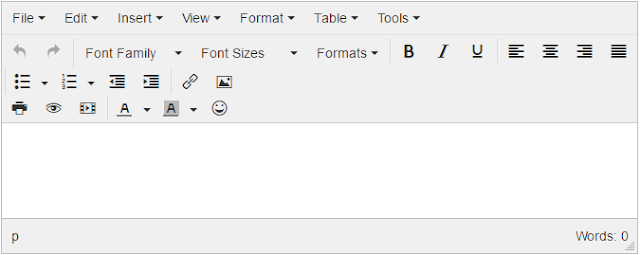 Please follow the below steps:
1. Download the TinyMCE JavaScript.
2. Upload the JavaScript as a static resource.
3. Refer the static resource in your VF page. Refer the below code snippet:
METHODS: There are following methods to get, set and remove the editor:
1. get - To get the reference of an editor. Provide the ID of textarea element.
1. Download the TinyMCE JavaScript.
2. Upload the JavaScript as a static resource.
3. Refer the static resource in your VF page. Refer the below code snippet:
<apex:includeScript value="{!URLFOR($Resource.TinyMCE,'tinymce.min.js')}"/>4. TinyMCE can convert <textArea> tags into rich text editor. Add a textarea on your VF page and provide an ID of that element.
<textarea id="textAreaId"></textarea>5. Add the below script on your VF page to convert the above textarea into rich text editor:
<script>6. You must have noticed that the "selector" attribute contains the ID of the TextArea element. If you want more than one editors on single page then you will have to call "INIT" function of TinyMCE again for the second element's ID. You can also run "INIT" function in a for loop with a variable selector attribute and create as many editors you want.
window.onload = function()
{
tinymce.init({
selector : "#textAreaId",
font_formats: 'Arial=arial,helvetica,sans-serif;Courier New=courier new,courier,monospace;AkrutiKndPadmini=Akpdmi-n;Andale Mono=andale mono,times;Arial Black=arial black,avant garde;Book Antiqua=book antiqua,palatino;Comic Sans MS=comic sans ms,sans-serif;Georgia=georgia,palatino;Helvetica=helvetica;Impact=impact,chicago;Tahoma=tahoma,arial,helvetica,sans-serif;Terminal=terminal,monaco;Times New Roman=times new roman,times;Trebuchet MS=trebuchet ms,geneva;Verdana=verdana,geneva;',
theme: "modern",
plugins: [
"advlist autolink lists link image charmap print preview hr anchor pagebreak",
"searchreplace wordcount visualblocks visualchars code fullscreen",
"insertdatetime media nonbreaking save table contextmenu directionality",
"emoticons template paste textcolor colorpicker textpattern imagetools"
],
toolbar1: "insertfile undo redo | fontselect fontsizeselect styleselect | bold italic underline | alignleft aligncenter alignright alignjustify | bullist numlist outdent indent | link image",
toolbar2: "print preview media | forecolor backcolor emoticons",
image_advtab: true
});
};
</script>
METHODS: There are following methods to get, set and remove the editor:
1. get - To get the reference of an editor. Provide the ID of textarea element.
tinyMCE.get('textAreaId');2. getContent - To get the value from an editor.
tinyMCE.get('textAreaId').getContent();3. setContent - To set a value into an editor.
tinyMCE.get('textAreaId').setContent('ANY CONTENT YOU WANT TO SET.');4. remove - To remove the TinyMCE Editor.
tinymce.remove();
First published on Blogger in 2017. Some screenshots and APIs have changed since; the code is kept as written.